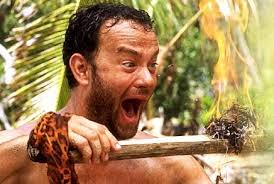
 I’ve got fire!
The “perfect” fire. Isn’t that something that we all want if we’re going to go to the effort of building one? To me the perfect fire entails one with minimal smoke, one that is burning efficiently enough that I hardly have any ashes left over, and of course, one that puts out plenty of heat. And that’s exactly what I’m going to share with you today.
I remember tuning in to the first episode of the Season 3 of “Survivor”. The show was still rated one of the most watched for its time slot and this particular season had cast several previous fans of the show. So you can imagine how I hollered at the television when the same old problem manifested itself—the cast members were seriously struggling to start a fire. Um, hello? If you’ve watched the show previously then you KNOW that you’ll need to know how to build a fire from nothing, right?? Don’t you think that’s a skill that you had time to learn—at least once you found out you’d be on the show, right?? *sigh* One of the interesting things I’ve noticed in watching shows like “Survivor“, “Dual Survivor” and even that oh, so lame show known as “Doomsday Preppers” *grin* is that there are a lot of intense moments surrounding the success or failure in building a fire. When you want it and need it, typically you want it NOW, and it can’t possibly be fast enough or warm enough. No problem. I gotcha covered in todays article. *grin*
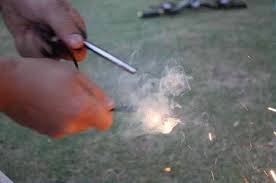 There are a host of fabulous fire starting helpers out there that I insist on having on hand such as the magnesium/flint fire starter that’s so easy to have on me all the time; the simple do-it-yourself small blocks of fuel-soaked wood with a hole drilled through the middle, storm-proof lighters, or another do-it-yourself project of coating small pieces of tinder in paraffin wax (which is highly flammable), BlastMatch, gel fuel fire starters and of course the rather expensive starter logs and of course the cool granules known as “Fire On” as well as a myriad of others. Mind you, none of these items will make their way to the next “Survivor Island”, but there’s certainly many ways that we can START a fire. The trick that I realized that I needed to learn long ago is how to create a fire with minimal smoke, minimal ashes, low maintenance for security purposes as well as one that will put out plenty of heat. No problem. I’ve got ya covered.
I learned how to make the typical Boy Scout fires from some talented Boy Scouts, but in the midst of my prepping research I came across a way to make a fire that’s almost completely backwards from every method I had learned and I loved how it met all of my criteria! The embers it produces are AWESOME! I call it the “upside down” fire.
First you put a layer of large logs at the bottom of the fire spot, lying straight and next to each other, with no space between them at all. Ideally these will be unsplit logs. This is the point at which you’ll be determining how big your fire will be. The key to not having to manage and play with the fire is being sure to have your logs close to each other on each level. If you do that, you’ve got yourself a 3 to 7 hour fire depending on the amount of materials used.
Next, lay a second layer of smaller logs on top of the largest ones, perpendicular to the first layer, and also making sure there’s no space between them. Ideally these will be split logs and you’ll want this layer to be just as wide and long as the layer directly beneath it.
Next, lay flat pieces of wood next to each other, leaving no space between each other, perpendicular to the previous row. Ideally these will be sapling wood or cedar shingle wood. This will cover the entire length and width of the layer just below it.
Now lay thick strips of CRUMPLED paper on your top, flat layer of wood, butted right up against each other, perpendicular to your previous level of wood. These strips will cover the entire length and width of your layer just below it. Newspaper is ideal for this level and you can even use small rolled newspaper logs.
Lastly put 3 to 5 fire starter pieces such as the blocks, or oil sticks or clusters of fuel soaked lint balls. You want to make sure that the newspaper is crumpled enough that it kind of props up the fire starting material. You need just a slight amount of spacing here between the newspaper and the fire starting material. If you don’t have any firestarter materials, bummer, then go ahead and use the finest of burn materials such as dried leaves, lint, saw dust, etc. You need enough so that the fire will burn just fine at the top layer for about 10 minutes. And be sure to remember to give some spacing and gaps between this fire starter level and the newspaper/magazine strips.
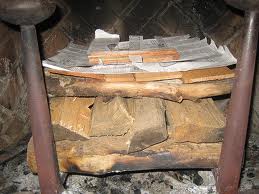 Finished Upside Down Fire as shown in The 4-Hour Chef by Timothy Ferris
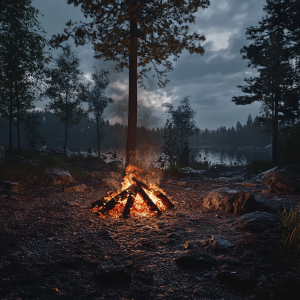
Then light your fire starter materials at the top. Be patient. Until it’s been going about 15-20 minutes you’ll be rolling your eyes at me thinking that I’m some nuts-zo giving you this kind of advice, but what you’re doing for that first little bit of time is creating embers that will fall to the layer below. This is also why you’ve GOT to have the pieces in each level close together so that the embers make their way down nice and slow. Best-selling author, Tim Ferris utilizes this method in his fire place and he states that once the top flat level of wood is about 75% burned, expect a LOT of heat. What’s happening is that the flame from the top is warming the air in your flue and in doing so it’s creating a more efficient current of air for cross-ventilation. As a result, you will have minimal smoke if any smoke at all because the flue air is being heated faster and you won’t have the nasty backdraft of smoke in your home. I also love that this gives me a minimal amount of ashes. I couldn’t believe it. You know that a fire is burning hot and burning well if you’re left with hardly anything to show for it. (Though this might not be what you want if you’re planning on using the ashes to make soap or to store preserved eggs, but that’s a whole ‘nother story.)
While there may be only a few days left in your area of cold and stormy nights, this fire will still come in handy on a cool summer night in which you’re camping in the hills. Be sure to actually practice this method so that you can be accustomed to it.
 Minimal smoke will mean that you’re not telling the whole freezing world around you that you’ve got heat and to spare, but you’ll certainly be putting out enough heat for long enough to keep several dozen bodies warm on a cold night, particularly if everyone’s feet are pointed towards the fire as they sleep in their bed bundles. And since the head is where the majority of heat is lost from the body, having everyone wear a winter cap to bed is a great idea to prevent a chill.
Now, go and start a fire somewhere and impress your family and friends. Of course no one will be impressed if you’re building a fire where a fire doesn’t belong as some people just have no sense of humor. Hee hee


18 Comments
Louise Raven · March 15, 2013 at 12:01 am
This is similar to how natural cremation is done…the body goes on the bottom with wood stacked over it. Just what everyone wanted to know!
Kellene Bishop · March 15, 2013 at 3:28 am
Well, ya never know what you might need to know someday… Cremation might just be a goodie.
Louise Newren · March 15, 2013 at 6:13 am
there are of course always the bag of fritos that are great for starting fires, if you happen to have some tucked away, or the dry top part of the cat tail ….the bottom of the cattail is good eating, tastes almost like asparagus, and can be dried and used for flour…..but of course, you smart lady, you knew these things right? big smile…….
Deborah · March 15, 2013 at 3:37 pm
All I can say is…YUKKKKK…lol
Kellene Bishop · March 15, 2013 at 6:33 pm
Nope, can’t say I did, but I have always wondered what would happen if I soaked the top part of the cat tail in rubbing alcohol or alcohol gel cause they always remind me of torches. I DID know about eating them but certainly didn’t know about making them into flour. Woohoo! I love learning new stuff!
jan · March 15, 2013 at 2:08 pm
hi kellene ~ regarding fire starters ~ i made over 3,000 fire starters this last summer using those little round 100% cotton cosmetic pads that the dollar store sells. there are 80 in a tube, and they stack up like pringles ~ very compact, unlike the ones made in the egg cartons with lint. i bought old candles and a shallow pan from the d.i. ~ then melted the wax, dipped the pads (holding them with hemostats) and set them on cookie sheets lined with foil. they cooled quickly and peeled off easily. great to add to the 72-hour backpacks. you just break them so the cotton pokes out and light them. they will burn for 7-10 minutes. they’re great for starting the fire in our fire pit and saves alot of money on lighter fluid. i can’t wait to try your wood stacking method the next time we’re camping. thanks for the great info ~ agaiin.
Kellene Bishop · March 15, 2013 at 6:34 pm
Great reminder and education for all of us. Thanks!
Bruce · March 15, 2013 at 2:55 pm
I would also suggest if you are buying a wood burning stove for your fireplace you look at the wood stoves that have a catalytic converter on them. We purchased one quite a few years ago from Vermont Castings and they have no visible smoke because the converter burns it off. One of those babies will heat the heck out of a home too.
Dawn · March 16, 2013 at 2:05 am
Great post!
sarawolf · March 16, 2013 at 3:26 pm
I love the fire making(building) info you posted, I would love to be able to print it off to share with others, is there a way? Your name still on it of course.
GoneWithTheWind · March 16, 2013 at 4:32 pm
I start a fire every morning to heat the house. The very best fire starter in the world is the McDonalds takeout bag with the burger box, fries bag and napkin inside it. kind of crumble/krinkle it up into a tube shape about 10 inches long and build your starter fire around it. Second best is a 5 inch section of a waxed cardboard cream container. (one side about 3″ by 5″ not the whole carton). I have discovered that building up the entire fire from kindling to big sticks doesn’t work well. It looks good and seems to make sense but it sometimes needs more attention just to keep it going until the bigger sticks catch fire. Instead I place two 2″-3″ diameter sticks on either side and place the paper bag in the middle. A couple of sticks about the size of my little finger or smaller preferably cedar (I cut and split old fence boards about 6″ long by 1/2″ thick). After it is buring I place 2-3 larger sticks (1 1/2″ by 8-10″) pine is good. Allow it to get burning then a cross piece (across the two original sticks on the side) and now it is ready for the bigger pieces and from there on it is just a matter of adding wood as needed. Another hint; save the largest straw you can find (7-11 big gulp straw) and as the paper is burning if it isn’t really cooking blow at it directly with the straw to make it blaze up. This will catch the kindling. Blow gently but continuously so you don’t disturb the kindling. I do sometimes start my fire using a fire stick instead of a match just for the fun of it.
Kellene Bishop · March 17, 2013 at 2:20 am
LOL…sorry, but there’s NO way I’d give McD’s my money–not even for trash that’s a great fire starter. LOL
Kellene Bishop · March 17, 2013 at 2:22 am
You can still print the page, you just can’t print just the article. ALL of my work is copyright protected and unfortunately there have been far too many who have taken the whole “sharing it with others” to the extreme to the point of compromising my ownership of my original work as they attempt to pass it off as their own. I work too hard for free to take that any longer. So we have to put some securities in place.
preppingforthefuture.com · March 20, 2013 at 2:48 pm
great info. no fire=no life. good tips. thanks
PrepForshtf.com · March 29, 2013 at 2:02 am
Great article but this meathod of fire building isn’t really new it’s been around many years.
Kellene Bishop · March 29, 2013 at 6:17 am
I agree it’s not “new to the free world” but it certainly is a NEW way of building to just about anyone who’s been building them.
Jan in Canada · March 30, 2013 at 5:28 am
It’s still pretty cool at night here, so I tried this backwards method just now in the wood stove. My biggest problem has been getting it to draw up the chimney. This worked like a charm. (Also, we stocked up on small propane bottles when they were on sale and I use these to start our fires. I feel like I’m cheating just a tad, but it only takes a minute for the kindling to catch.)
Military Logstician · April 20, 2013 at 9:04 am
Get hold of a ten pack of full sized Bic lighters. Each lighter should give you about a thousand lights which is almost enough for 3 startups per day for a year. Seven lighters for seven years. The three extra are for redundancy/back up purposes, or if you need more than just a couple of seconds per light. Also recommend multiple types of fire starters such as 9-volt battery and steel wool, flint and steel, to name a few. My favorite is building a fresnel lens. Like a magnifying glass only bigger, faster, hotter. Once had a butterfly enter the kill zone and it flamed on like Johnny of the Fantastic Four, but only for a few seconds…then it was gone…disintegrated. Be careful, a really big one can set you on fire almost instantaneously near the focal point.
Comments are closed.