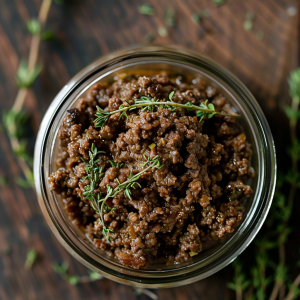
home canned ground beef
This week has been full of all kinds of activities in readiness for the Christmas holiday, but I still have to keep up on my self-sufficiency duties. I received my fabulous ground beef from Zaycon Foods this past week and decided to turn the necessity of canning it into a video tutorial. Canning ground beef or other ground meats is a little different than canning chicken or fish because I actually cook the ground meat first. This little tutorial will also give you some tips as to how to ensure great pressure canning results in general as well as some suggestions on how to select a good canner, troubleshooting, and of course, safety. Hope you enjoy it!
Questions and Answers about Canning Ground Beef:
Be sure to watch the YouTube video with thorough instructions. Then come back here and check out the Q & A.
What about instructions for high elevations? I used the 12.5 to 15 pounds of pressure because of my elevation (in Utah at the time), however, I should have made it more clear that folks need to refer to their manufacturer’s guide for specific use of the canner in their particular elevation.
Can you just use a hot pad to get the jars out or do you need that tool you used? Well you can use a hot pad but one thing I discovered is that the moment you are removing those jars from the canner is when the glass is the most volatile so even a little bump of the jars could cause it to shatter. So it’s best to handle them with a firm grip as provided by the jar lifter. They maybe cost $3, so they are worth the peace of mind they bring.
What do you mean by washing them off and “stinking” afterwards? Because it’s common for juices to expel from the jars during the pressure canning, those juices can remain on the outside of the jars. As such, I wash them off with hot soapy water–CAREFULLY–before I put them away. It gives me one more chance to check the seal too.
I thought meat can only be canned in pints, not quarts; is that accurate? There are instructions for both on renowned canning instruction sites as well as the instruction manual and will be confirmed if you call All-American’s help line or contact them vie e-mail.
Someone pointed out that the quick release may cause the jars to boil over; is that accurate? It’s not accurate unless you do not provide sufficient head room. Ultimately you’ll know whether or not your jars are sealed in due time. However, this is part of the reason why I wait a week before I put my jars away. When it comes to canning anything with fat in it, even with a natural release you still need to be mindful of not over-filling the jars so as to avoid fat particles from preventing a seal. Let’s be logical about this for a moment and say that perhaps the jars were to boil over during the quick release period. The question is, did the food get cooked long enough to eliminate contamination? Yup. Did that food then get sealed inside the jar? Yup–you’ll know that when you check your jars after cooling. The little pings that you’ll hear as they seal will be music to your ears. So, even if the jars were to boil over (which will happen when you have too much in them), it’s not creating a food safety risk because the entire environment is heated and sanitized within the pressure canner. Some grumpy person wrote a contentious comment claiming that I was going to kill people with this method saying that by boiling over bacteria can get into the jars. Bacteria into the jars, huh? And where might that bacteria come from–the 250 degree water that’s been cooking for the past 90 minutes?? Uh, nope. I don’t think that even MRSA can survive that kind of abuse. (At 250°F (121°C), MRSA cannot survive. This temperature is commonly used in autoclaving, a sterilization method used in medical and laboratory settings, which effectively kills all bacteria, spores, and viruses.) Again, the key is to make sure that your jars seal properly after you’ve removed them from the canner and set them to cool. IF they don’t seal, then yes, you CAN introduce bacteria and even mold inside after the fact.
waterbath canning
Do you use the USDA Guidelines for your canning efforts? Not necessarily. They are the same persons who would have us believe that raw milk requires a hazmat team and expense to clean up but who believe that using ammonia as a “preserving agent” in meat is acceptable. I get the majority of my information for the articles I write based on well-worn and loved books, expert interviews, and personal experience.
I noticed you didn’t mention anything about boiling the lids or sanitizing the jars. Did I miss that? Nope. You didn’t miss that. Such instructions are typically provided when you are water bathing canned goods because there is very little heat time. However, when you are canning meat you are exposing both the food and the canning jars and lids for an extensive period of time under extreme heat which is suitable to eliminate contamination concerns.
Can I use broth instead of water? Yes, you CAN however I wouldn’t simply because the meat sitting in that water for all that time makes a delicious broth in and of itself, so I don’t see the need.
I noticed you set the timer right after you put the weight on. Shouldn’t it be when your pressure canner comes up to full pressure? Actually, yes, you’re correct. I flubbed that (happens when talking to a camera sometimes). I know my particular canner and stove well enough by now to know how quickly it comes up to pressure after I put the weight on. It’s never more than a couple of minutes. However, prudence would dictate that I should have said to “wait until your canner comes up to full pressure and THEN start timing your cooking time.”
I noticed you didn’t use much salt. I thought I was supposed to use salt. Salt isn’t necessary for the canning process in this case, though it is necessary for getting the best flavor. I used plenty of salt ultimately when I was cooking my meat. I salt a little, then taste, salt a little more. I didn’t show that on the camera because I have this thing about not wanting to eat on camera. Ahem… *grin*
I was under the impression that it was important to remove all fat from home canning projects for safety purposes. As a person who’s long preserved straight fats for long-term storage, I would have to disagree with this notion. The concern has some validity though as it is fat which CAN get on the rims of the jars and thus compromise the sealing. However, with suitable pressure, heat, and canning time, the fat is appropriately thin so that when the flat lid presses down to seal, it can press out any fat that’s on the lid (kind of like squeezing toothpaste out of the tube; when you stop pressing down on it, a portion of it sucks back into the tube as a result of the temporary suction. This is what happens when sufficient pressure has been built up in each of the jars.
Salting your canned ground beef?
I always see meat juices in the water after canning meat. Is that dangerous? Is that supposed to happen? That will happen if your jars are too full. The potential problem though is IF the moderate amount of fat that will then be in that water ends up obstructing the flat lid of sealing. This is why I check and double check that my jars have sealed properly, even to the point of waiting a week before putting them away.
How do you store your jars to protect them from breaking? I have fallen in love with Jar Boxes. (look them up on the internet). It’s a great investment to protect my hard earned money and effort.
Can I try to reseal a jar after I see that it hasn’t sealed? Yes, but you need to do so immediately. If need be you can put it in the refrigerator until you’re going to re-can them, but it should be within 24 hours AND you will need to use a NEW lid.
I always get hard water ring on the outside of my jars and inside my canner. What can I do about that? A little bit of white vinegar poured into your canning water will take care of that problem easily!
My jars always end up so much less full than when I put them in the canner. Am I doing something wrong? Nope. It’s just fine. It’s nothing other than your meat shrinking just like it does when you cook it regularly.
Help me to better understand the reason for letting the steam come out of the spout for 10 minutes before putting the weight on. You know how they talk about people getting so angry that they’re going to blow their top? Well, it’s kind of like that. You want to get the interior of your canner hot enough so that it creates enough steam that it needs somewhere to escape. And being safe rather than sorry is a good motto in this part. As such, a full 10 minutes of steam escaping ensures that when I put that weight on, there will be enough heat and steam in the interior to immediately build up the pressure. The steaming part is allowing an outlet for the pressure, but as soon as I put the weight on, it begins to build up. It will take you significantly longer (and thus more fuel) to build up the heat and pressure inside if you did not use this method.
Your jars look so much prettier than mine. *laugh* I THINK that it might have something to do with how full a person fills the jars. I’ve learned the hard way that overfilling the jars no only wasted perfectly good broth by it boiling out during the pressure canning, but it just makes things look a little less attractive. Mind you, I’m not sure there’s much attractive about canned chicken from the outside–I’m sure that’s why the stores never sell canned meats without a label to cover up the inside. *grin*
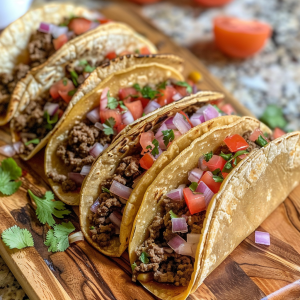
Ground beef tacos made with home canned ground beef
“I nearly cried when I saw you say not to get a Presto.” Aww…I’m sorry. I surely didn’t want someone to cry. The good news is that the really old Presto canners still have some value. So you could keep an eye out for those on the classifieds. However, anyone who tries to tell you that a new Presto Pressure Canner is just as good as a new All-American Pressure Canner clearly has not spent nearly every day for a year canning and cooking in a Presto. Their seals and even their metal are eventually compromised. And if I were to ever find myself in a long-term crisis scenario, the last thing I need is a pressure canner that’s useless to me. It’s just not a risk I’m willing to take. The instructions for the Presto Pressure COOKER are very telling. Their metal composite is SO weak that the instructions don’t even permit you to cook beans directly in the pan, rather you need to put only a small amount of beans in another container and then put that in the pan in order to pressure cook it. ANY pressure cooker that’s worth a dime should have no problem handling the cooking of beans. Nuff said. More good news though…a lot of people just don’t appreciate the merits of a pressure canner and as such estate sales, garage sales and classifieds are a great place to find unloved and unappreciated assets. Their blindness is YOUR BLING. *grin* So keep an eye out. Nobody says you have to pay top dollar.
I’m afraid of my pressure canner or afraid that I’m going to give someone food poisoning. If you follow the directions in your instruction manual you’ll find a VERY conservative approach to canning. They have to do that so that their lawyers will be happy. In actuality, according the to CDC you have a much higher risk of getting food poisoning from a restaurant than your home canning. And should you feel a little unpleasantness coming on, having some Ravensara Essential Oil on hand and the knowledge of how to use it, will help you with that!
Do you have instructions for canning other kinds of meats? Yup, sure do. You can find my step-by-step for canning chicken here and bacon here. I heard that relying on a pressure canning in a crisis isn’t a good idea because you’ll run out of lids since you can only use them once. Ironically it was the skill of canning that fed a lot of families during the Great Depression, even saving their lives, but the good news is that Tattler Lids are REUSABLE canning lids and they’re lovely to use. I’ve only used mine a couple of times because I have lots and lots of new lids, but I am stocking up on Tattler Lids over time slowly so that I won’t even be without lids when I need them.
Can you pressure can meats in larger batches like in the 1/2 gallon jars? Nope, the half-gallon jars are not recommended for pressure canning, though they can be used for water batch/bath canning and dry canning. Otherwise, stick with the smaller jars.


24 Comments
Teresa Matthews · September 4, 2013 at 11:41 pm
Hi Kellene , I was searching
Hi Kellene , I was searching the web on how to can hamburger and came on our sight. You mentioned Zaycon and got me curious. I placed my first order for chicken. Thank you so much for sharing. I was trying to give you credit on the credit box that you referred me but I don’t think it went through just letting your know. I love buying in bulk I can, dehydrate and freeze We just added live chickens to our list of being self reliant. Love those fresh eggs!! Thanks again for the information of canning hamburger. Take care, Teresa Matthews
Brad Giessinger · September 23, 2013 at 6:13 am
I have gone to Zaycon Foods
I have gone to Zaycon Foods and registered, however I am not seeing ground beef. Have they discontinued selling ground beef ?
Preparedness Pro · September 23, 2013 at 7:13 am
Definitely not. Keep in mind
Definitely not. Keep in mind that Zaycon does a special every month. Chicken is the main one that you can count on twice a year even if you’re area is new or has a smaller amount of people in it, the chicken is done. Their other products of ground beef and bacon are typically staples you can count on coming to your area too. But they just did a ground beef special a couple of months ago. I plan on each of the items I like being available twice a year. So just stay tuned to their e-mails announcing their sales events, and you’ll be fine.
Aled Francis · October 16, 2013 at 7:12 am
Thank you for sharing your
Thank you for sharing your valuable knowledge. How long will the pressure canned food kept in a cold (less than 23 degrees) and dark room last?
Preparedness Pro · October 16, 2013 at 3:04 pm
Generally 3-5 years is the
Generally 3-5 years is the standard Kellene goes by. (post by C for Preparedness Pro)
Aled Francis · October 16, 2013 at 7:23 am
What size All American
What size All American pressure canner do you recommend? 23.5 range or bigger? Would you buy bigger with hindsight and what size/ type jars do you recommend?
Thank you
Preparedness Pro · October 17, 2013 at 2:40 am
Kellene has both the smaller
Kellene has both the smaller one that only holds 7 quarts and the larger one that holds14 quarts. Her cooking arrangement does not allow her to use the larger one at this time. The more you can do at one time the better it is if you plan on doing a lot of canning. You might want to make sure your stove can handle the size you want. Kerr/Ball jars are the most common and are preferred. Mason jars are also another brand that you come across in thrift stores and garage that are of the same quality as Kerr and Ball.
Debra Place · October 19, 2013 at 8:11 pm
We also stocked up (somewhat
We also stocked up (somewhat on Tattler lids). I have used them on items such as breads and fruits (water bath items). I didn’t want to risk a “learning curve” on expensive items like meat. I seriously recommend using them and getting used to them. About 1/3 of the items I’ve canned with them have gone bad because I somehow did not get the rubber ring centered correctly (virtually impossible to do…). I’ve canned for years so this was quite a surprise to me. I’ve pretty much given up on using them because I have 1-2 jars per batch go bad and I can’t find the reason. I recommend using a sure thing with regular lids on expensive things like meats.
Preparedness Pro · October 19, 2013 at 11:09 pm
Debra, I’m sorry you’ve had a
Debra, I’m sorry you’ve had a snag with using the Tattler Lids. I wholly encourage you to give them a jingle. They are happy to help folks. I had a little learning curve on using them as well, but nowadays I dont’ even think about it. I use them just as easily as anything else and I so LOVE not having to worry anymore about my rings rusting, etc. The #1 mistake folks make is screwing the lids on too tightly before canning. Just FYI. No sense in wasting good money you’ve spent on them thus far. Give them a call. They are super duper friendly and very helpful.
dusty · October 26, 2013 at 2:59 pm
Kellene…I was trying to get
Kellene…I was trying to get a look at the other stand-alone burner you were using in the video…can you give me any info. on it?
Preparedness Pro · October 27, 2013 at 6:17 am
It was way too small for that
It was way too small for that canner. Instead, I have to use my Chefmate Propane burner outdoors for that size canner cause it doesn’t fit under my overhead microwave.
Rose · November 3, 2013 at 11:55 pm
Hi, I bought a huge can of
Hi, I bought a huge can of chilli for an event and did not use it. I would like to store it in smaller batches. Can I can it in pint jars or quarts jars?
Preparedness Pro · February 7, 2014 at 6:24 am
Well I certainly would opt to
Well I certainly would opt to do that. In fact there are many times when I purchase the large #10 cans of items that I can get for a good deal and then bring them home to can in more realistic sizes for our everyday meals.
Carol Rohrer · February 7, 2014 at 5:55 am
I noticed that my ground beef
I noticed that my ground beef that I canned has turned a different color where the meat is above the moisture line, is that a problem?
Preparedness Pro · February 7, 2014 at 6:23 am
Nope, that’s to be expected.
Nope, that’s to be expected. I get that with all of my meats. It’s even more noticably different when I can some dry and wet batches of the same meat in the same batch. Moisture will always change the appearance. Don’t fret.
dian · February 27, 2014 at 5:40 pm
love your info, question
love your info, question though as I have an a/m canner also, you had prepped all your jars 28 quarts , while you pc 7 at a time, what was going on with the jars not processed yet ? did you just put the tops on them filled and have them sit on the counter for all those hours waiting their turn .. I am a 4 week newbee . Thanks from Atlanta Ga
Preparedness Pro · February 28, 2014 at 10:09 am
I usually have 2 canners
I usually have 2 canners going at once, however, when I don’t, I simply leave the sealed jars at room temperature. They are being cooked and pressurized–there’s no way a bug is going to endure that alive! If I can’t can them in a 3-4 hour time frame, then I refrigerate them until I’m able to, but when I do that, I have to let them come back down to room temperature so as not to risk bursting the jars.
Lila · April 15, 2014 at 8:09 pm
Kellene, have you ever used
Kellene, have you ever used the red tattler lids? I see they come in bulk and I was wondering if there would be any difference.
Preparedness Pro · April 15, 2014 at 8:29 pm
Any time you want information
Any time you want information on some other component of prepping, the best thing to do here is to put the term into our search box. With nearly 1,000 articles now, it’s bound to come up.
Here’s the one I wrote on the Tattler Lids, http://www.preparednesspro.com/the-tattler-tale-canning-heaven
Zamble · June 21, 2014 at 6:17 pm
I have read that when
I have read that when hamburger is canned, it becomes grainy when you eat it. I am considering canning it, but like chunks of hamburger for meals like spaghetti, chilli, etc.
is it true that the meat will just fall apart to tiny bit during the canning process?
Thanks.
Preparedness Pro · June 21, 2014 at 10:32 pm
You should take a look at the
You should take a look at the articles that we’ve written on canning meat as well as the YouTube videos on our Preparedness Pro channel re: canning meat. A picture is worth a thousand words and will set you straight in sifting through the hearsay.
Anna · August 3, 2014 at 6:21 pm
Can you add seasonings to it,
Can you add seasonings to it, such as chili powder?
Preparedness Pro · August 4, 2014 at 5:54 am
You can, but do it AFTER you
You can, but do it AFTER you’ve canned them, when you use them for a recipe, that way every precious jar of it can be used for whatever you want instead of being pigeon-holed for just one type of use.
dl.jenk · August 25, 2014 at 4:06 am
love canning chicken, the
love canning chicken, the flavor is so much richer than boiled and is so full of moisture! I have not tried canning any other meats but will be after finding this sight. I froze my meat but prefer to can. Thank you for the information. Have a blessed day
Comments are closed.