DIY yeast from raisins
Never Buy Yeast Again: Your Guide to Self-Sufficient Bread Making
In a world where store shelves can go bare overnight, the ability to make your own yeast might be the difference between fresh bread and going without. While many preppers diligently store commercial yeast packets in their freezers, there’s a time-tested secret that our great-grandmothers knew all too well: you can make your own yeast, and it’s easier than you might think.
Before commercial yeast became a grocery store staple, families kept their bread supplies flowing using techniques passed down through generations. These methods didn’t just work – they produced bread that was more nutritious and often more flavorful than what we make with store-bought yeast today. The best part? Everything you need is probably sitting in your pantry right now.
Making Yeast from Potatoes
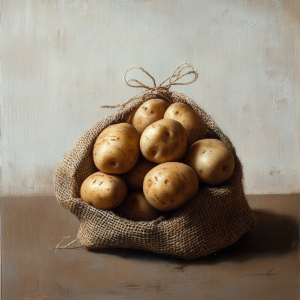
Let’s start with my favorite method for beginners: the potato technique. There’s something almost magical about this process, and it’s remarkably reliable. Those humble potatoes in your storage aren’t just versatile food items – they’re actually covered in wild yeast just waiting to be cultivated. To harness this natural yeast factory, you’ll need just a potato, some water, sugar, and flour. Start by peeling one medium potato (save those peels – they’re the key players here). Boil the peels in two cups of water for about five minutes, then strain and let the water cool to room temperature. Add a tablespoon of sugar and half a cup of flour to the cooled potato water, cover loosely with a clean cloth, and let nature do its thing. Within 24-48 hours, you’ll notice bubbles forming and that distinctive, yeasty aroma that means success.
DIY yeast from potatoes
Making Yeast from Raisins
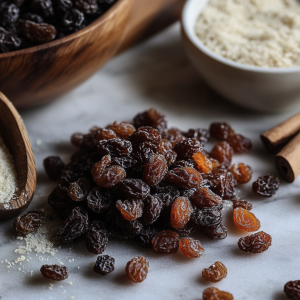
For those with dried fruit in their storage, there’s another fantastic method using raisins. That whitish coating you sometimes see on raisins? It’s not dust – it’s actually a natural yeast bloom. To create a starter from raisins, fill a jar halfway with them, cover with water plus an extra inch, and add a teaspoon of sugar. Leave this mixture loosely covered at room temperature, stirring daily. In about 3-5 days, when you see consistent bubbling, strain the liquid and mix it with equal parts flour. After another 24 hours, you’ll have a viable yeast starter ready for baking.
Making Yeast from Flour (aka the Sourdough Method)
The third method, often called sourdough starter, is perhaps the most reliable long-term solution, though it requires more patience. Begin by mixing half a cup of whole wheat flour (fresh ground is best, but store-bought works) with a quarter cup of water. Cover this mixture loosely and wait 24 hours. Each day after that, remove half the mixture and add a quarter cup of flour and two tablespoons of water. Keep this routine going for about 5-7 days, until you see consistent bubbling. Whole wheat flour works better than white because it naturally contains more wild yeast.
Working with DIY Yeast
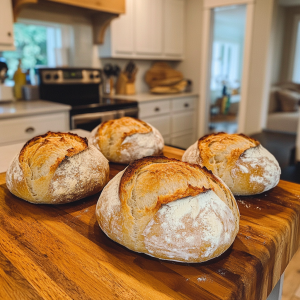
Sourdough Bread made from yeast from flour
Now, here’s where many beginners hit a wall – using wild yeast is different from commercial yeast. You’ll need to adjust your expectations and techniques. Wild yeast isn’t as concentrated as commercial varieties, so expect longer rising times – usually double what your recipe calls for. You’ll also need more starter, typically about a cup per loaf. Patience becomes your most important ingredient.
Keeping your starter alive is crucial but not complicated. If you’re baking frequently, keep it at room temperature and feed it equal parts flour and water daily. For longer-term storage, keep it in the refrigerator and feed it weekly. Always save a portion when baking – think of it as your insurance policy for future loaves.
Why does this matter for preppers? Commercial yeast has limitations – it can’t reproduce indefinitely, and eventually, stored yeast dies. These traditional methods are completely sustainable, historically proven (remember, people made bread long before commercial yeast existed), and free you from dependency on the supply chain. As a bonus, the resulting bread is more nutritious and often easier to digest.
If your starter isn’t bubbling, don’t panic. Try moving it to a warmer spot, check that your water is chlorine-free (chlorine can kill wild yeast), ensure your container isn’t sealed tight (yeast needs to breathe), and above all, be patient. Sometimes it takes a few tries to get it right.
Here’s a bonus tip that few people know: if you have access to fresh fruit, the whitish bloom on grape skins, plums, or berries can be used just like the raisin method. Our ancestors knew this trick well, and it’s worth keeping in your back pocket for emergency situations.
The key to success with any of these methods is practice. Don’t wait until you need these skills to try them out. Start experimenting now, while you can afford to make mistakes and learn from them. Each batch of bread you make will teach you something new about working with wild yeast.
Remember, self-sufficiency isn’t just about storing supplies – it’s about having the knowledge and skills to create what you need from what’s available. Making your own yeast is more than just a survival skill; it’s a connection to our heritage and a step toward true food independence. So the next time you’re at the store, skip the yeast packets. Instead, grab some raisins or potatoes and start your journey toward bread-making self-sufficiency.
